How to create a collaborative online whiteboard with React, Zustand, and Liveblocks

In this 25-minute tutorial, we’ll be building a collaborative whiteboard app using React, Zustand and Liveblocks. As users add and move rectangles in a canvas, changes will be automatically synced and persisted, allowing for a canvas that updates in realtime across clients. Users will also be able to see other users selections, and undo and redo actions.

This guide assumes that you’re already familiar with React and Zustand. If you’re not using Zustand, we recommend reading one of our dedicated whiteboard tutorials:

A live demo and the source code for this guide are in our examples.

Install Liveblocks into your project

Install Liveblocks packages

Create a new app with create-react-app:

$npx create-react-app zustand-whiteboard --template typescript

To start a plain JavaScript project, you can omit the --template typescript flag.

Then install the Liveblocks packages and Zustand:

$npm install zustand @liveblocks/client @liveblocks/zustand

Connect to Liveblocks servers

In order to use Liveblocks, we’ll need to sign up and get an API key. Create an account, then navigate to the dashboard to find your public key. It should start with pk_.

Create a new file src/store.ts and initialize the Liveblocks client with your public API key. Then add our liveblocks middleware to your store configuration.

src/store.ts
import create from "zustand";import { createClient } from "@liveblocks/client";import { liveblocks } from "@liveblocks/zustand";import type { WithLiveblocks } from "@liveblocks/zustand";
type State = { // Your Zustand state type will be defined here};
const client = createClient({ publicApiKey: "",});
const useStore = create<WithLiveblocks<State>>()( liveblocks( (set) => ({ // Your state and actions will go here }), { client } ));
export default useStore;

Connect to a Liveblocks room

Liveblocks uses the concept of rooms, separate virtual spaces where people can collaborate. To create a multiplayer experience, multiple users must be connected to the same room.

Our middleware injected the object liveblocks to the store. Inside that object, the first methods that we are going to use are enterRoom and leaveRoom.

In our main component, we want to connect to the Liveblocks room when the component does mount, and leave the room when it unmounts.

src/App.tsx
import { useEffect } from "react";import useStore from "./store";
import "./App.css";
export default function App() { const enterRoom = useStore((state) => state.liveblocks.enterRoom); const leaveRoom = useStore((state) => state.liveblocks.leaveRoom);
useEffect(() => { enterRoom("zustand-whiteboard"); return () => { leaveRoom("zustand-whiteboard"); }; }, [enterRoom, leaveRoom]);
return <div className="container">Whiteboard app</div>;}

Create a canvas

Whiteboard shapes will be stored even after all users disconnect, so we will use Liveblocks storage to persist them.

Add a shapes property to your store, and tell the middleware to sync and persist them with Liveblocks.

To achieve that, we are going to use the middleware option storageMapping: { shapes: true }. It means that the part of the state named shapes should be automatically synced with Liveblocks Storage.

src/store.ts
import create from "zustand";import { createClient } from "@liveblocks/client";import { liveblocks } from "@liveblocks/zustand";import type { WithLiveblocks } from "@liveblocks/zustand";
export type Shape = { x: number; y: number; fill: string;};
type State = { shapes: Record<string, Shape>;};
const client = createClient({ publicApiKey: "",});
const useStore = create<WithLiveblocks<State>>()( liveblocks( (set) => ({ shapes: {}, }), { client, storageMapping: { shapes: true }, } ));
export default useStore;

Afterwards, we draw the shapes in our canvas. To keep it simple for the tutorial, we are going to only support rectangle.

src/App.tsx
import { useEffect } from "react";import useStore from "./store";import type { Shape } from "./store";
import "./App.css";
export default function App() { const shapes = useStore((state) => state.shapes); const enterRoom = useStore((state) => state.liveblocks.enterRoom); const leaveRoom = useStore((state) => state.liveblocks.leaveRoom); const isLoading = useStore((state) => state.liveblocks.isStorageLoading);
useEffect(() => { enterRoom("zustand-whiteboard"); return () => { leaveRoom("zustand-whiteboard"); }; }, [enterRoom, leaveRoom]);
if (isLoading) { return <div className="loading">Loading...</div>; }
return ( <div className="canvas"> {Object.entries(shapes).map(([shapeId, shape]) => { return <Rectangle key={shapeId} shape={shape} />; })} </div> );}
const Rectangle = ({ shape }: { shape: Shape }) => { return ( <div className="rectangle" style={{ transform: `translate(${shape.x}px, ${shape.y}px)`, backgroundColor: shape.fill ? shape.fill : "#CCC", }} ></div> );};

Place the following within src/App.css, and then you will be able to insert rectangular shapes into the whiteboard.

Insert rectangles

Currently our whiteboard is empty, and there’s no way to add rectangles. Let’s create a button that adds a randomly placed rectangle to the board.

Add a new function to your store that randomly insert a rectangle on the board.

src/store.ts
import create from "zustand";import { createClient } from "@liveblocks/client";import { liveblocks } from "@liveblocks/zustand";import type { WithLiveblocks } from "@liveblocks/zustand";
export type Shape = { x: number; y: number; fill: string;};
type State = { shapes: Record<string, Shape>; insertRectangle: () => void;};
const client = createClient({ publicApiKey: "",});
const COLORS = ["#DC2626", "#D97706", "#059669", "#7C3AED", "#DB2777"];
function getRandomInt(max: number) { return Math.floor(Math.random() * max);}
function getRandomColor() { return COLORS[getRandomInt(COLORS.length)];}
const useStore = create<WithLiveblocks<State>>()( liveblocks( (set, get) => ({ shapes: {}, insertRectangle: () => { const { shapes } = get();
const shapeId = Date.now().toString(); const shape = { x: getRandomInt(300), y: getRandomInt(300), fill: getRandomColor(), };
set({ shapes: { ...shapes, [shapeId]: shape }, }); }, }), { client, storageMapping: { shapes: true }, } ));
export default useStore;

Then add a button to call this function from the board.

src/App.tsx
import { useEffect } from "react";import useStore from "./store";
import "./App.css";
export default function App() { const shapes = useStore((state) => state.shapes); const insertRectangle = useStore((state) => state.insertRectangle);
/* ... */
return ( <> <div className="canvas"> {Object.entries(shapes).map(([shapeId, shape]) => { return <Rectangle key={shapeId} shape={shape} />; })} </div> <div className="toolbar"> <button onClick={insertRectangle}>Rectangle</button> </div> </> );}
/* Rectangle */

Add selection

We can use Liveblocks to display which shape each user is currently selecting, in this case by adding a border to the rectangles. We’ll use a blue border to represent the local user, and green borders for remote users.

Any online user could select a shape, and we need to keep track of this, so it’s best if each user holds their own selectedShape property.

Luckily, Liveblocks uses the concept of presence to handle these temporary states. A user’s presence can be used to represent the position of a cursor on screen, or in this case the selected shape in a design tool.

We want to add some data to our Zustand store, selectedShape will contain the selected shape id. selectedShape will be set when the user select or insert a rectangle.

The middleware option presenceMapping: { selectedShape: true } means that we want to automatically sync the part of the state named selectedShape to Liveblocks Presence.

src/store.ts
/* ... */
type State = { shapes: Record<string, Shape>; selectedShape: string | null; insertRectangle: () => void; onShapePointerDown: (shapeId: string | null) => void;};
/* ... */
const useStore = create<WithLiveblocks<State>>()( liveblocks( (set, get) => ({ shapes: {}, selectedShape: null, insertRectangle: () => { const { shapes } = get();
const shapeId = Date.now().toString(); const shape = { x: getRandomInt(300), y: getRandomInt(300), fill: getRandomColor(), };
set({ shapes: { ...shapes, [shapeId]: shape }, selectedShape: shapeId, }); }, onShapePointerDown: (shapeId) => { set({ selectedShape: shapeId }); }, }), { client, storageMapping: { shapes: true }, presenceMapping: { selectedShape: true }, } ));
export default useStore;

Update your App and Rectangle components to show if a shape is selected by the current user or someone else in the room.

src/App.tsx
import { useEffect } from "react";import useStore from "./store";
import "./App.css";
export default function App() { const shapes = useStore((state) => state.shapes); const insertRectangle = useStore((state) => state.insertRectangle); const others = useStore((state) => state.liveblocks.others); const selectedShape = useStore((state) => state.selectedShape);
/* ... */
return ( <> <div className="canvas"> {Object.entries(shapes).map(([shapeId, shape]) => { let selectionColor = "transparent";
if (selectedShape === shapeId) { selectionColor = "blue"; } else if ( others.some((user) => user.presence?.selectedShape === shapeId) ) { selectionColor = "green"; }
return ( <Rectangle key={shapeId} id={shapeId} shape={shape} selectionColor={selectionColor} /> ); })} </div> <div className="toolbar"> <button onClick={insertRectangle}>Rectangle</button> </div> </> );}
const Rectangle = (props: { id: string; shape: Shape; selectionColor: string;}) => { const { id, shape, selectionColor } = props; const onShapePointerDown = useStore((state) => state.onShapePointerDown);
return ( <div className="rectangle" style={{ transform: `translate(${shape.x}px, ${shape.y}px)`, backgroundColor: shape.fill ? shape.fill : "#CCC", borderColor: selectionColor, }} onPointerDown={(e) => { e.stopPropagation(); onShapePointerDown(id); }} ></div> );};

Delete rectangles

Now that users can select rectangles, we can add a button that allow deleting rectangles too.

Add a deleteShape to remove the selected shape from shapes, and then reset the user’s selection:

src/store.ts
/* ... */
type State = { shapes: Record<string, Shape>; selectedShape: string | null; insertRectangle: () => void; onShapePointerDown: (shapeId: string | null) => void; deleteShape: () => void;};
/* ... */
const useStore = create<WithLiveblocks<State>>()( liveblocks( (set, get) => ({ shapes: {}, selectedShape: null, insertRectangle: () => { /* ... */ }, onShapePointerDown: (shapeId) => { /* ... */ }, deleteShape: () => { const { shapes, selectedShape } = get(); if (!selectedShape) { /* Nothing todo */ return; } const { [selectedShape]: shapeToDelete, ...newShapes } = shapes; set({ shapes: newShapes, selectedShape: null, }); }, }), { client, storageMapping: { shapes: true }, presenceMapping: { selectedShape: true }, } ));
export default useStore;
src/App.ts
import { useEffect } from "react";import useStore from "./store";
import "./App.css";
export default function App() { const shapes = useStore((state) => state.shapes); const insertRectangle = useStore((state) => state.insertRectangle); const others = useStore((state) => state.liveblocks.others); const selectedShape = useStore((state) => state.selectedShape); const deleteShape = useStore((state) => state.deleteShape);
/* ... */
return ( <> <div className="canvas">{/* ... */}</div> <div className="toolbar"> <button onClick={insertRectangle}>Rectangle</button> <button onClick={deleteShape} disabled={selectedShape === null}> Delete </button> </div> </> );}
/* Rectangle */

Move rectangles

Let’s move some rectangles!

To allow users to move rectangles, we’ll update the x and y properties of the selected shape when a user drags it:

src/store.ts
/* ... */
type State = { shapes: Record<string, Shape>; selectedShape: string | null; isDragging: boolean; insertRectangle: () => void; onShapePointerDown: (shapeId: string | null) => void; deleteShape: () => void; onCanvasPointerUp: () => void; onCanvasPointerMove: (e: React.PointerEvent) => void;};
/* ... */
const useStore = create<WithLiveblocks<State>>()( liveblocks( (set, get) => ({ shapes: {}, selectedShape: null, isDragging: false,
insertRectangle: () => { /* ... */ }, onShapePointerDown: (shapeId) => { set({ selectedShape: shapeId, isDragging: true }); }, deleteShape: () => { /* ... */ }, onCanvasPointerUp: () => { set({ isDragging: false }); }, onCanvasPointerMove: (e) => { e.preventDefault();
const { isDragging, shapes, selectedShape } = get(); if (!selectedShape) { /* Nothing todo */ return; }
const shape = shapes[selectedShape];
if (shape && isDragging) { set({ shapes: { ...shapes, [selectedShape]: { ...shape, x: e.clientX - 50, y: e.clientY - 50, }, }, }); } }, }), { client, storageMapping: { shapes: true }, presenceMapping: { selectedShape: true }, } ));
export default useStore;
src/App.tsx
import { useEffect } from "react";import useStore from "./store";
import "./App.css";
export default function App() { const shapes = useStore((state) => state.shapes); const insertRectangle = useStore((state) => state.insertRectangle); const others = useStore((state) => state.liveblocks.others); const selectedShape = useStore((state) => state.selectedShape); const deleteShape = useStore((state) => state.deleteShape); const onCanvasPointerMove = useStore((state) => state.onCanvasPointerMove); const onCanvasPointerUp = useStore((state) => state.onCanvasPointerUp);
/* ... */
return ( <> <div className="canvas" onPointerMove={onCanvasPointerMove} onPointerUp={onCanvasPointerUp} > {/* ... */} </div> <div className="toolbar">{/* ... */}</div> </> );}
/* Rectangle */

Multiplayer undo/redo

With Liveblocks, you can enable multiplayer undo/redo in just a few lines of code.

Add two buttons to the toolbar and bind them to room.history.undo and room.history.redo. These functions only impact modifications made to the room’s storage.

src/App.tsx
import { useEffect } from "react";import useStore from "./store";
import "./App.css";
export default function App() { const shapes = useStore((state) => state.shapes); const insertRectangle = useStore((state) => state.insertRectangle); const others = useStore((state) => state.liveblocks.others); const selectedShape = useStore((state) => state.selectedShape); const deleteShape = useStore((state) => state.deleteShape); const onCanvasPointerMove = useStore((state) => state.onCanvasPointerMove); const onCanvasPointerUp = useStore((state) => state.onCanvasPointerUp); const undo = useStore((state) => state.liveblocks.room?.history.undo); const redo = useStore((state) => state.liveblocks.room?.history.redo);
/* ... */
return ( <> <div className="canvas" onPointerMove={onCanvasPointerMove} onPointerUp={onCanvasPointerUp} > {/* ... */} </div> <div className="toolbar"> <button onClick={insertRectangle}>Rectangle</button> <button onClick={deleteShape} disabled={selectedShape === null}> Delete </button> <button onClick={undo}>Undo</button> <button onClick={redo}>Redo</button> </div> </> );}
/* Rectangle */

Pause and resume history

When a user moves a rectangle, a large number of actions are sent to Liveblocks and live synced, enabling other users to see movements in realtime.

The problem with this is that the undo button returns the rectangle to the last intermediary position, and not the position where the rectangle started its movement. We can fix this by pausing storage history until the move has completed.

We’ll use history.pause to disable adding any positions to the history stack while the cursors moves, and then call history.resume afterwards.

src/store.ts
/* ... */
const useStore = create<WithLiveblocks<State>>()( liveblocks( (set, get) => ({ isDragging: false, shapes: {}, selectedShape: null,
insertRectangle: () => { /* ... */ }, onShapePointerDown: (shapeId) => { get().liveblocks.room?.history.pause(); set({ selectedShape: shapeId, isDragging: true }); }, deleteShape: () => { /* ... */ }, onCanvasPointerUp: () => { set({ isDragging: false }); get().liveblocks.room?.history.resume(); }, onCanvasPointerMove: (e) => { /* ... */ }, }), { client, storageMapping: { shapes: true }, presenceMapping: { selectedShape: true }, } ));
export default useStore;

Add selection to history

By default, presence updates are not added to the room’s history. Let’s add the current user selection to the room’s history to improve our undo/redo behavior.

To accomplish that, use room.updatePresence with the option addToHistory to update selectedShape. Liveblocks middleware will update store selectedShape for you.

src/store.ts
/* ... */
const useStore = create<WithLiveblocks<State>>()( liveblocks( (set, get) => ({ isDragging: false, shapes: {}, selectedShape: null,
insertRectangle: () => { const { shapes, liveblocks } = get();
const shapeId = Date.now().toString(); const shape = { x: getRandomInt(300), y: getRandomInt(300), fill: getRandomColor(), };
liveblocks.room?.updatePresence( { selectedShape: shapeId }, { addToHistory: true } ); set({ shapes: { ...shapes, [shapeId]: shape }, }); }, onShapePointerDown: (shapeId) => { const room = get().liveblocks.room; room?.history.pause(); room?.updatePresence( { selectedShape: shapeId }, { addToHistory: true } ); set({ isDragging: true }); }, deleteShape: () => { const { shapes, selectedShape, liveblocks } = get(); if (!selectedShape) { /* Nothing todo */ return; } const { [selectedShape]: shapeToDelete, ...newShapes } = shapes; liveblocks.room?.updatePresence( { selectedShape: null }, { addToHistory: true } ); set({ shapes: newShapes }); }, onCanvasPointerUp: () => { /* ... */ }, onCanvasPointerMove: (e) => { /* ... */ }, }), { client, storageMapping: { shapes: true }, presenceMapping: { selectedShape: true }, } ));
export default useStore;

Voilà! We have a working collaborative whiteboard app, with persistent data storage.

Summary

In this tutorial, we’ve learnt about the concept of rooms, presence, and others. We've also learnt how to put all these into practice, and how to persist state using storage too.

You can see some stats about the room you created in your dashboard.
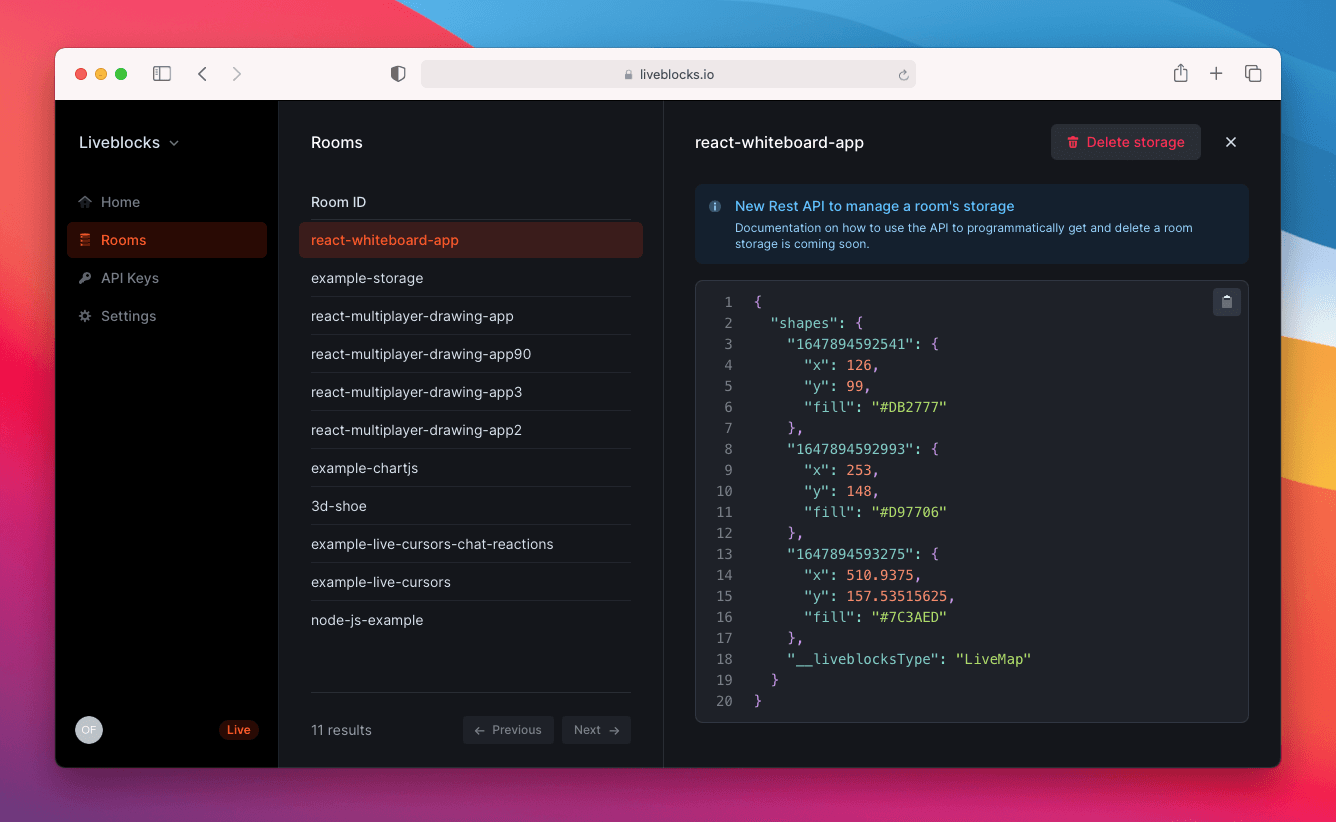
Liveblocks dashboard

Next steps